Search This Blog

Saturday, 6 September 2014

Slow Cooked Baked Beans

I love my slow cooker. It is one of the best things that resides in my kitchen.

Most foods these days are chocked full of preservatives and nasties, so I love to try and re-create my favourite foods in any way I can. I finally have perfected my baked bean recipe and I am excited to share this one with you. I hope you enjoy as much as I do.

Ingredients:

1 cup of water
1 tsp stock
1/2 cup of finely chopped spinach
1 spring onion, finely chopped
1 onion, finely chopped
1 can of cannellini beans, drained
1 cup of adzuki beans *
2 cups tomato passata/ paste
1 tsp paprika
1 tsp salt
2 tbsp sugar
2 tsp molasses 
2 tbsp soy sauce

Method:
*Leave the Adzuki beans soaking overnight
 then drain well. Boil for 15 minutes on the stove.

Combine everything in the slow cooker including the Adzuki beans and leave to cook on high for 4-5 hours. 

The flavours are excellent and everyone gobbles this up as soon as I make it.

Let me know how it goes for you!

Sunday, 11 May 2014

Sweet Dango

I have been hankering to do something different so when I came across this recipe on Just One Cookbook I thought I would give it a go. I changed a few things but if you want to try the orginal recipe as well then just click on the link :D


Ingredients
  • 24 Bamboo skewers
  • 100g Rice Flour
  • 100g Glutinous Rice Flour
  • 2 tsp. sugar
  • ⅔ cup (150ml) warm water
Sweet Soy Sauce
  • 5 Tsp. sugar
  • 1 Tbsp. soy sauce
  • 1 Tbsp. Hosin Sauce
  • 1 Tsp ground ginger
  • 4 Tbsp. water
  • 1 Tbsp. Arrow Root
  • 1 Tbsp. water for dissolving arrow root
  1. Combine both flours and sugar in a bowl (I would have added more sugar)
  2. Stir in warm water a little bit a time and knead slowly and gently until the dough becomes smooth.
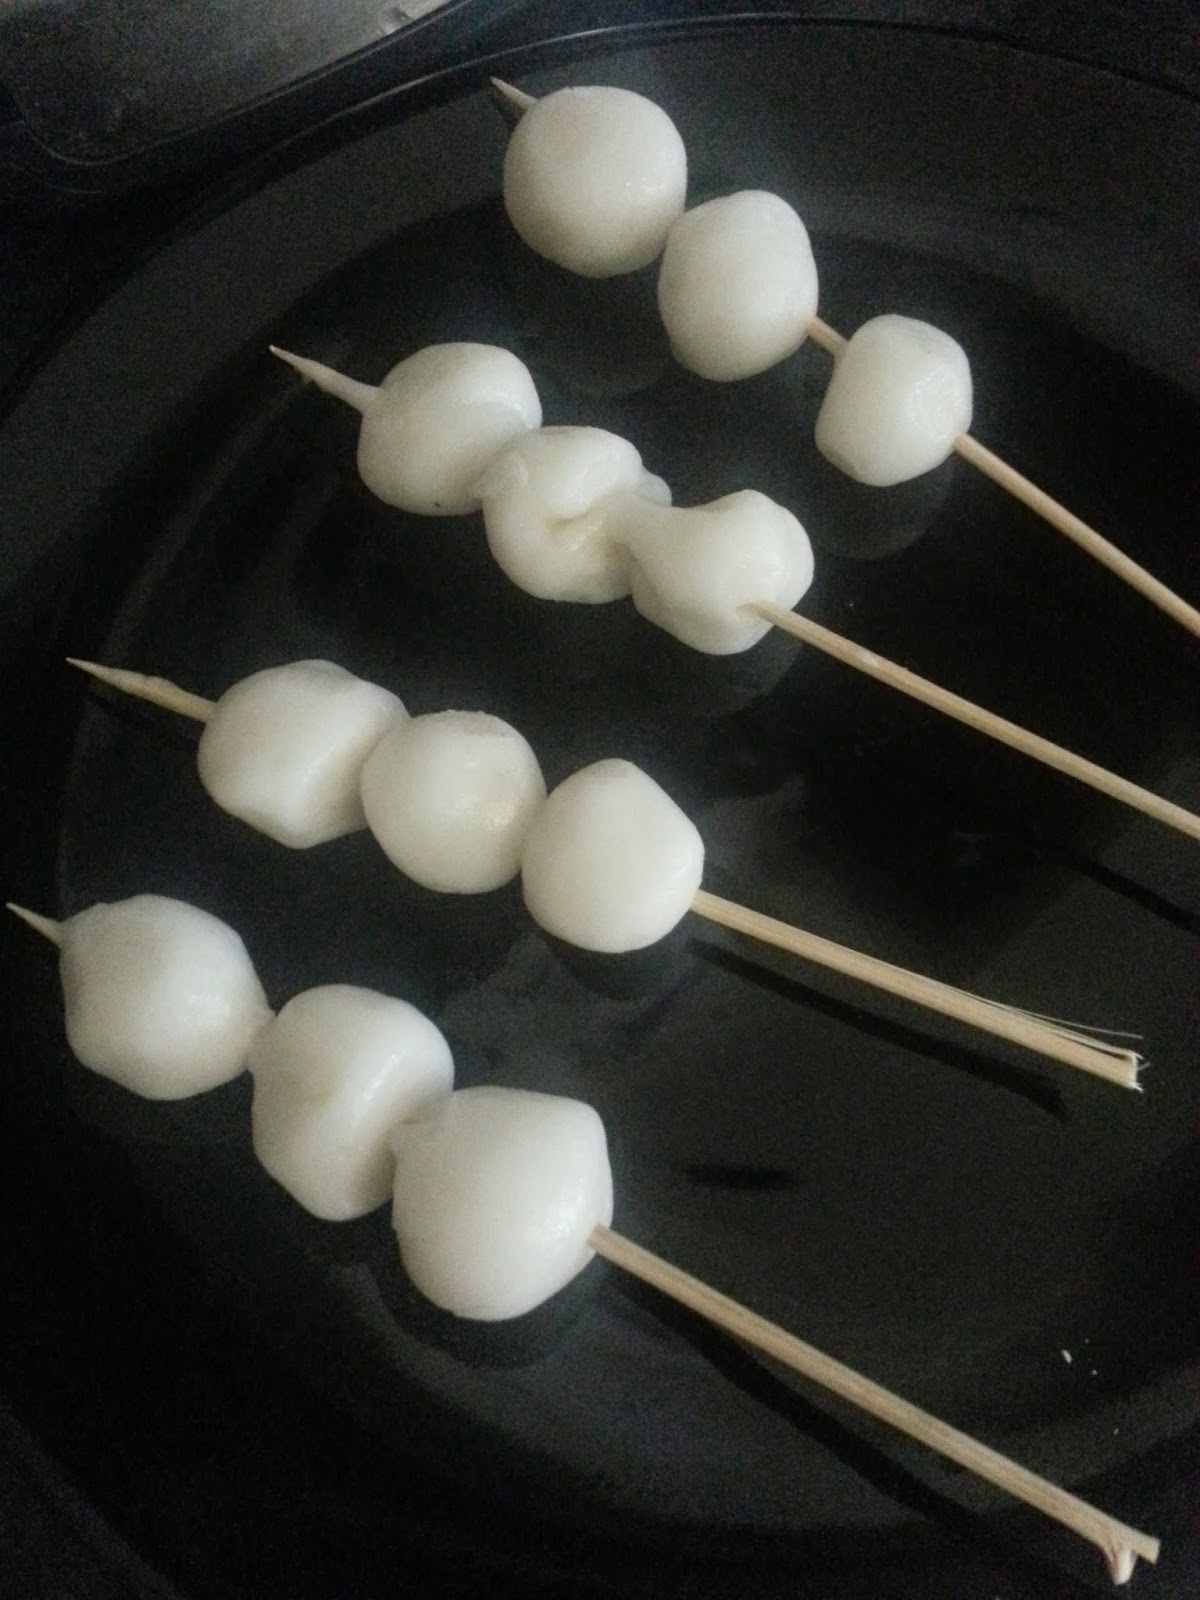
  3. Roll the dough in your hands till you have 24 little balls. Gently place dango in the large pot of boiling water. 
  4. The Dango will stay on the bottom of the pan for a bit but they will start to float to the surface of the water. Cook dango for 1 minute more. Remove from pot and transfer into ice water. 
  5. Drain well and put three pieces into a bamboo skewer. 
  6. On the stove top, heat a pan and brush with a little oil and grill on it).
  7. For sauce, combine sugar, soy sauce, hosin, ginger and water in a saucepan. Stir occasionally and bring it to a boil. 
  8. Once it boils, add the arrow root and water mixture to the sauce and make sure it dissolves well. After the sauce thickens, turn off the heat.
  9. Place dango on a plate. Using a brush, coat with sweet soy sauce on dango. 
If you wanted to make different flavour dango, then add powder to the flour stage. I also made green tea ones. Next I would love to try a strong ginger type. 

Tuesday, 6 May 2014

Super Awesome Doughnuts

I have been trying to perfect the doughnut recipe and I think I have. My partner told me they they taste just like store bought so they are better than just nice.  He is a harsh critic so when he say's things like that I know I have a winner.

These doughnuts are a burst of happiness in your mouth and you can literally use this recipe as base for any type of flavour you want. To date I have made gingerbread doughnuts, mint, basil and sage doughnuts, chocolate doughnuts and cinnamon doughnuts. 


BASE RECIPE:
 
Ingredients:

Doughnuts:
2 tsp yeast
3/4 cup whole milk, warmed
2 1/2 cups of plain flour
1/4 cup sugar
1 egg
1/2 tsp salt
3 tbsp butter
1/2 glutenous rice flour 

*If you wanted to make gingerbread doughnuts then add 2-3 tsp ground ginger, depending on how strong you like it.

*For mint, basil and sage doughnuts, infuse the herbs when you warm the milk for about 15 minutes then strain.  

Glaze: (you can use any type of flavouring, like ground cinnamon, not just chocolate,)

2 tbsp milk
2 tbsp chocolate powder (optional)
1 1/2 cups icing sugar

Method:

1) Mix the yeast with the warm milk. Milk should be blood temperature.

2) In your food processor, mixer or bowl combine the flours, butter, salt and sugar till mixture is like breadcrumbs.

3) Beat the egg and add it to the flour mix and whizz for a few seconds.Slowly add the yeasty milk and let the machine knead for about 5 minutes (or knead by hand for 10 minutes) If the dough is too sticky add a little bit more flour but don't over do it. 

4) Oil a bowl placing dough in and cover. Let it rise in a warm place until doubled the size.

5) Take dough out of the bowl and transfer to a lightly floured bench. Punch dough and knead for about 1 minute. Roll dough till it is approx 1.5cm thick. Cut out doughnuts with a cookie cutter and (I used a apple corer to cut out the center of each doughnut. Save the ball and let doughnuts and balls rise till double the thickness. 

6) Heat the oil in a large frying pan or deep fryer till a test piece of bread sizzles. Add four doughnuts at a time, cook till golden brown, being careful to keep an eye on them and turn them. 

7) Drain doughnuts on paper towel. Make the glaze and while still warm, dip the tops of the doughnuts and balls into the glaze and let set. Doughnuts can be stored in an air tight container for up to three days.

Thursday, 6 March 2014

Best Pancake Recipe

In honor of Pancake Tuesday, we had pancakes for breakfast. I found that these pancakes were just so nice and fluffy!

Ingredients
  • 1 1/4 cups self-raising flour
  • 1/2 teaspoon baking powder
  • 2 tablespoons caster sugar
  • 1 egg
  • 1 cup milk
  • 1 teaspoon allspice
  • 1 teaspoon vanilla essence
  • 1 teaspoon salt 
  • 20g butter, melted
Method:

Sift salt, flour, allspice and baking powder into a bowl then add the sugar. Whisk vanilla, egg, milk and butter together and pour into flour mixture, whisking until smooth. Set aside for 5 minutes. Cook over a medium heat, turning when golden.  

Vegetable Fritters

This week I wanted to make zucchini fritters, but I had run out of zucchini. I then had a thought, what about skipping the zucchini altogether and just having mixed vegetables. I am so glad I did, these were so good even Little A had some. I don't even have any pictures because they got eaten so fast!

Ingredients:
  • 1/2 cup self-raising flour
  • 1 cup cheese, finely grated
  • 1/2 cup creamed corn 
  • 1 small onion, thinly sliced
  • 1 cup of carrot, grated
  • 1 cup pumpkin, grated
  • 1/2 cup cabbage, grated
  • 1/2 cup red capsicum, chopped 
  • 1 egg, whisked
  • 1/4 cup fresh parsley, chopped
  • 1 teaspoons allspice
  • 1 teaspoon salt
  • 1 teaspoon of soy sauce
Method:

Mix together all the ingredients in a bowl. Then heat 2 teaspoons oil in a non-stick frying pan over medium-high heat. Drop 2-tablespoonful measures of vegetable mixture into pan. Cook for 1 1/2 minutes each side or until golden and cooked through. Transfer to a plate lined with paper towel. 

Saturday, 8 February 2014

Nutella Brownies

I found this recipe off Stay At Home Mum and thought that would be excellent to make for my Little Lady. It is a super easy and super tasty recipe and you must all try it!


Nutella Brownies

2 Eggs
1/2 cup plain flour
1 cup Nutella

(That is seriously all the ingredients!!!)

Method:
  1. Preheat your oven to 180 degrees celsius
  2. Simply beat the eggs and nutella together till glossy. 
  3. Add the flour and mix well.
  4. Pour into a rectangular pan (either greased or papered)
  5. Stick into the oven for 20 minutes or until top feels set.
(In the original recipe the time called for 12-15 minutes but mine wasn't done by then so I added the time here it took me)

Saturday, 1 February 2014

Mochi with a Strawberry, Watermelon Red Bean Paste filling

Today I created a Mochi for the first time. For anyone that doesn't know, a Mochi is a Japanese rice cake made of  glutinous rice. The rice is pounded into paste and molded into the desired shape or you can buy glutinous rice powder at the supermarket. While Mochi are eaten year-round, they are a traditional food for the Japanese New Year and are commonly sold and eaten during that time. You can fill the Mochi with a variety of fillings and even use it in soups. 

These are really easy to make and very tasty. I used a red bean paste to which i added watermelon and strawberries to it. I would suggest making the filling before making the Mochi skins as the skins take about 4-5 minutes to make. 


Here is the recipe:

Strawberry, Watermelon and Red Bean Paste

2 cups (Red Beans)Azuki Beans
1/2 cup sugar
1 cup warm water
1/2 cup hulled strawberries
1 cup chopped watermelon

(SOAK RED BEANS OVERNIGHT)

1) Rinse and wash your soaked red beans and then place into a large saucepan. Fill the pan with water till it just covers the beans and bring to the boil. Drain beans and then re-fill with water till beans are just covered again. 
2) Bring the beans back to the boil then turn the heat down to a simmer. Keep an eye on the bean mixture and add more water as needed. Don't fill it to far, only enough water to just cover the beans. Take the 1 cup of water and your sugar and mix together then set aside.
3) When the mixture is starting to look a little drier and the beans squish between your fingers. Add the strawberries, watermelon and sugar mixture and boil till you can see the bottom of the pan when you stir it. The whole process should take about an hour. 
4) Blitz the bean mixture for a few seconds in a food processor then chill till needed.

Now to make the Mochi:
(I used the recipe found at Bakingdom)

You can only use glutinous rice flour, there are no substitutions 

1 1/2 cups glutinous rice flour
1/4 cup sugar
2/3 cups water
2 drops red or green food coloring
1/2 cup corn flour

1) Combine the glutinous rice flour, sugar, water, and food coloring in a medium size microwave safe bowl. Stir the mixture until no lumps remain.
2) Cover the bowl loosely with plastic wrap ( it still works with out it) and microwave for 2 minutes. Remove from the microwave and throughly stir mixture. Re-cover and put back into the microwave for an extra 1 minute. 
3) The dough will start to inflate and expand while in the microwave. When it is done, it will expand then deflate as soon as you open the microwave door. dust your counter/board with corn flour
 and scrape the hot dough onto the surface. Be careful as this mixture is very hot and will cause burns if handled incorrectly!
4) Gently stretch the dough and flatten it with your hands. When you are satisfied cut into pieces and place 1/2 a tsp of red bean mixture onto the wrapping. Gently pinch the edges together to seal the Mochi.
5) Serve straight away or cover and it will keep for a day.

Friday, 24 January 2014

Cheesy Sausage Balls

 (Picture is from Syrup and Biscuits)
I made these the other day and omg, they were good. I had never thought to make anything like these before, but apparently these sausage things are huge in the Southern states of USA. I came across the recipe from the blog Syrup and Biscuits. I highly recommend you go and check out this blog, there are very yummo stuff on there.

Now I changed the recipe a little bit as we don't have bisquick (baking mix) here in Australia. I felt that these could have been a bit better if I had added some creamed corn. Next time I will. If you are wanting the original recipe then click on the link above.

Ingredients:
1 cups cheddar cheese, grated
1 1/2 cups mozzarella cheese, grated
1 cup plain flour
1 tsp bi-carb
1 tsp salt
1/4 teaspoon ground cayenne pepper, optional
2 tbs soy sauce
1/2 cup of cauliflower and pumpkin breadcrumbs*
2 tbs milk
2 Italian herb sausages deskinned, uncooked

*CAULIFLOWER AND PUMPKIN BREADCRUMBS
Take half a head of cauliflower and half a pumpkin and place in a food processor. Wizz until you have the consistency of breadcrumbs. You can place what you don't use in the freezer for another time.

Method:
1) In a large bowl add your cheese, flour, bi-carb, salt, cayenne and mix well.
2) Add sausages, soy sauce, cauliflower and pumpkin bread crumbs and milk to flour and cheese mix. 
3) Stir until all the ingredients are thoroughly mixed.
4) Make sure to spray your tray or put down grease proof paper. Then grab a small amount of mixture in your hands and roll into balls the size of walnuts. These don't spread too much, so you can place them 2.5cm apart then gently press down so they look a little like patties.
5) Place into the oven and bake for about 20 minutes at 200 degrees C. These are going to be very hot so let them sit on the sheet for a few minutes before eating.

 These are quick and easy to do and they freeze well. Next time I would add some creamed corn to give it a sweet flavour. They are great for school lunch boxes as well, if they aren't eaten too quickly. Try them out and tell me what you think!!!

Sunday, 19 January 2014

Peach and Strawberry Eggless Ice-Cream

I really wanted to make ice cream today. Only I was missing a few ingredients and I didn't want to go up to the shop to get them. What was I to do?? I could have waited (which I am not very good at doing) or I could go wild and make up a completely new and different recipe which I will now share with you.

I make ice cream a lot lately and I think that this one has been the best combination so far. I had no eggs and I can't handle a lot of milk products so I thought there must be a way to overcome these problems... and there was. Read on for one of the best ice cream recipes:


Ingredients:

1 cup coconut milk
1 cup lactose free milk (or you can sub normal milk, soy milk, oat milk etc)
4 tsp Arrowroot powder
1 1/4 cup of silken tofu ( or you can sub whipped cream)
2/3 cup sugar
2 tbs syrup (honey, maple or golden)
1/4 tsp salt
2 tsp ground ginger
2 cups sliced peaches
1 cup diced strawberries

Method:

To make tofu mixture

1)  Place silken tofu into a blender/food processor with a tsp of either sugar or syrup and wizz until the tofu is the consistancy of whipped cream. Place into a bowl and set aside in the fridge.

To make fruit mixture

1) Place peaches and strawberries into a blender/food processor and blend till you have a thick puree. Place into a bowl and set aside in the fridge.

To make the custard

1) Pour 3/4 cup of your milk into a bowl and mix in the arrowroot powder and mix to a paste. Set aside.
2) In a saucepan, mix remainder of both milks, sugar, salt, ground ginger, syrup and gently heat. 
3) When warm, add the arrowroot mixture and stir over a low heat till mixture thickens and coats the back of a spoon. Remove from heat, pour into a metal bowl and place into the fridge till cold.

To make ice-cream

1) Take the custard, tofu and fruit out of the fridge. Set aside 1/4 cup of the fruit mixture and gently mix everything else together till thoroughly combined.
2) Place mixture into your ice-cream machine as per your machines instructions.
3) When it is the consistency of soft serve take out of the machine and place into a container. Layer the ice cream with the excess fruit mixture till you have filled the container.
4) Place into the freezer till it has set.
5) Enjoy :D

Let me know what you think!

I'm back!

Hi all,

Just wanted to apologise for my lengthy disappearance from this blog. I didn't even realise that it had been so long. I have cooked many a thing in the last 6 months and I just haven't had time to blog about it. Well the time has come to change that! I will endeavour to post a new recipe once a week for my loyal readers :D

Look out for some great recipes to come!

Tarran
Related Posts Plugin for WordPress, Blogger...